So, out of the box, I had realized that I made a huge error in understanding what all I needed for this project since I was working with the raspberry pi zero. First problem was that we realized that the micro usb and micro hdmi ports required cables we overlooked. The battery handled the micro power cable so that was not a problem. We made sure to go out and get a micro HDMI cable and a micro usb converter. This was honestly a huge oversight. When working with hardware this small, it's important to remember to know exactly what you need. Not just for the pi, but to develop on it. Also in this time, I ordered a bread board with some wires to begin laying out the circuits for when we solder the rest of the pi. After getting these pieces, my partner Cameron Schwach and I were ready to begin soldering the female header pins.
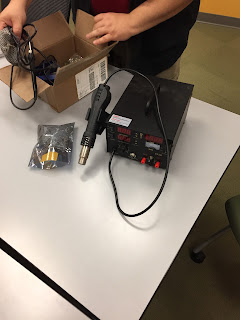
Lucky for me, Cameron had ordered a soldering iron of his own before even coming to FIEA. We heated up the iron to 350 and began testing on another header pin before soldering for the actual pi.
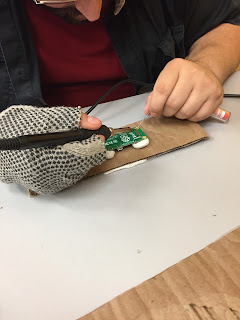
One other thing we realized was that with a pi this size, it became hard to get the solder onto the pins accurately. Cameron realized we needed to use the flat head attachment for the soldering iron. The correct technique to get the solder onto the pins is to hold the iron directly on the pin and then add then place the solder onto the hot iron. This makes the solder become attracted to the pin and much easier to hand off. The important thing to keep in mind is that the solder needs to create a bond for each pin to the gold ring pin holes on the pi.
One word of caution. The iron is very hot so a slight burn may not hurt that much, but you risk dropping the iron and potentially damaging what you are working on. For this reason, it is wise to wear a glove on the hand that is holding the soldering iron. Also, in order to keep the raspberry pi from moving around while you are soldering, we added sticky tac to the the bottom side and stuck it onto a piece of cardboard to keep avoid damage to the table were working on.

The soldering went very smoothly. We successfully soldered on the female header pins to the bottom of the pi and had the finished product below:
With the header pins in place, I was ready to begin programming the pi to get some input from the buttons I had purchased. However, the first step was to get the development software onto the pi.
I went with raspbian which you can install using noobs. I followed the instructions on raspberry pi's website.
https://www.raspberrypi.org/downloads/raspbian/
Following the instructions was easy and I placed the OS on a micro SD card then I place that on the pi and booted it up.
When booting up the pi for the first time, you will be greeted with a screen to select the operating system to install. I selected the raspbian option and booted up to the main screen.
One annoying thing before going forward. The pi can only take one input to the usb at a time. This said, you will swapping between the keyboard and mouse frequently so be prepared for that.
Bluetooth:
Now, one of the great things about the raspberry pi 0 is that it comes with bluetooth and wifi on the device. But one thing to remember is that you need to install blueman in order to use bluetooth. Install with the following command:
-sudo apt-get install blueman
When prompted (Y/N)? type Y and hit enter
Update:
This should handle installation for bluetooth functionality, however make sure that your software is up to date. You can do this by entering the following command
-raspi-config
This will open your config options on the pi and you may see this screen
From here, you can do many things such as change your password to something you'll remember. However, while we are here, go to the interfacing options to enable both your serial and ssh options. These will be important for the next connection steps I will cover in the next post.
Lastly, update the pi with one of the options and then reboot the pi.
Bluetooth connection:
Now comes the cool part. If you go to the bluetooth symbol on the top of the screen (Two over from volume) and click on it, you will see the option to make the device discoverable. Do this and then go back to your computer and scan for bluetooth devices to add.
Note: your computer must have bluetooth in order to scan for it.
Once you find your device, click to add it. You will then be prompted with a screen asking if the number of the pi is correct. Click yes and then on your pi, it will say you have a request to join another device. Click yes and what may happen your first time is that the pi will say there is an error and that you disconnected. Nothing is wrong, you just need to try again. Sometimes, the device will also give you an error after this step and it will wind up paired anyway. Regardless, do not worry if it fails to pair the first time. All other times should go smoothly.
Alright, you should have your device paired and you are ready like me to move on to the next step to program a serial port to begin sending data over bluetooth to your computer. However, that is where this post ends. We will cover Serial data and buttons in the next post.
More cools things to come!


